

I know this is a little late as Thanksgiving is this Thursday, but wanted to share a tutorial for creating adorable felted pumpkins as seen on my Instagram. This would be a great project to do on Thanksgiving if your plans got cancelled due to Covid. The felting technique can be used in a variety of different ways, just take a look on Pinterest to get an idea. These felted pumpkins are a great beginner project!
Materials
- Needle Felting Kit: for this project I would recommend at least purchasing a single needle felting tool, a multi-needle felting tool, a foam felting mat, and felting thimbles. I got this complete kit that even comes with small bags of wool roving (where I got the color for the stem)!
- Wool roving: you can choose whatever color(s) you like. Please see the wool roving I used for my favorite pumpkin and the example in this tutorial here, both also come in many color options – Tangerine Merino Wool Roving White Wool Roving
- Styrofoam balls: these will be used as the center of the pumpkin to give it the rounded shape. I purchased both 3″ foam balls and 4″ foam balls, but you can get really any size you would like. Hobby Lobby also has foam pumpkins for $1 each that are about 6 inches and don’t require you to do any shaping of the foam (just remove the stem that comes attached).
- Serrated knife, Styrofoam cutter, or box cutter
Instructions
See instructions for each step below each photo.
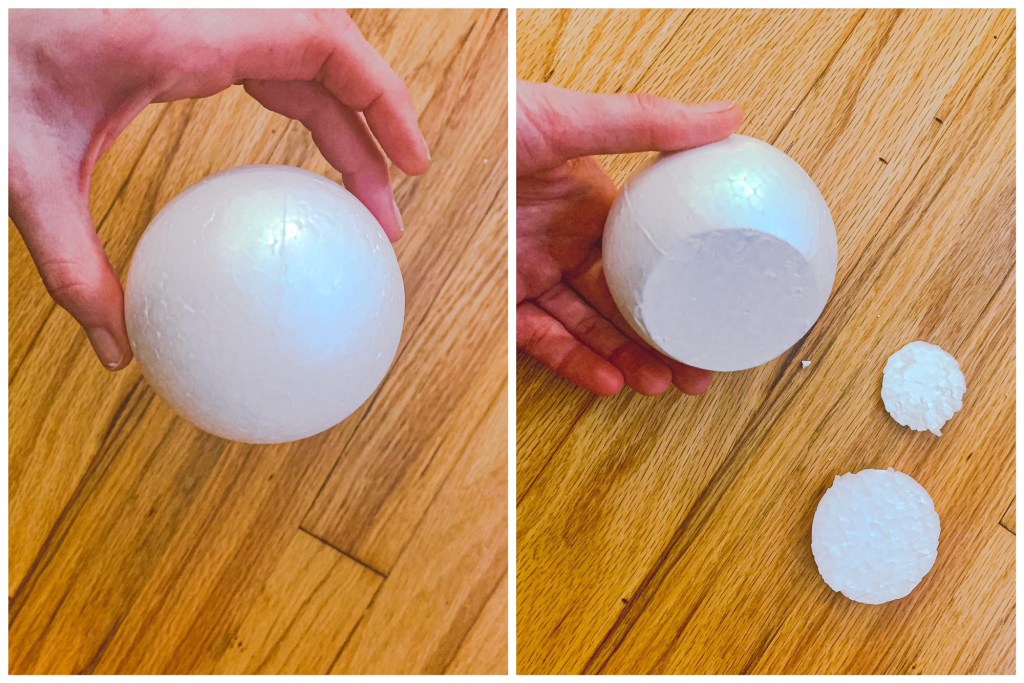
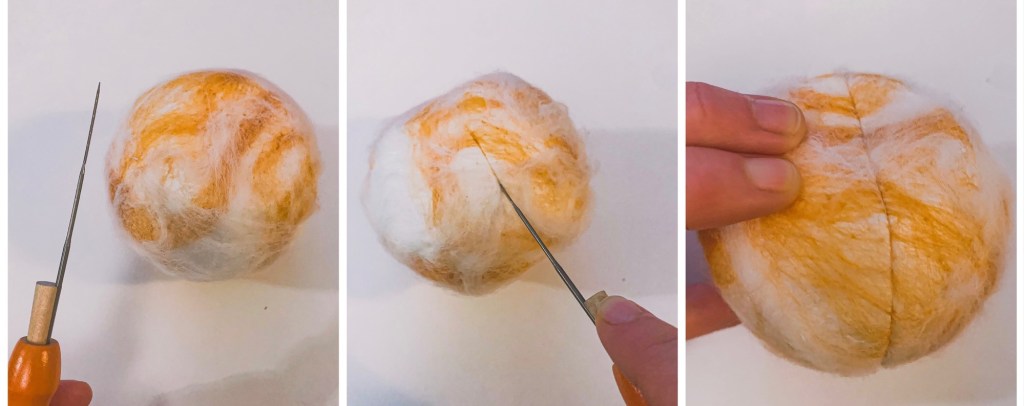
Take a Styrofoam ball (size of your choosing) and cut slivers off of opposite ends. I found it easiest to use a serrated knife to do this, but a box cutter also works. You can see how cutting it this way gives it more of a pumpkin shape and also creates a flat edge for the pumpkin to sit on. cut the slivers larger or smaller depending on whether you want the pumpkin to be shorter and stockier or taller and thinner.
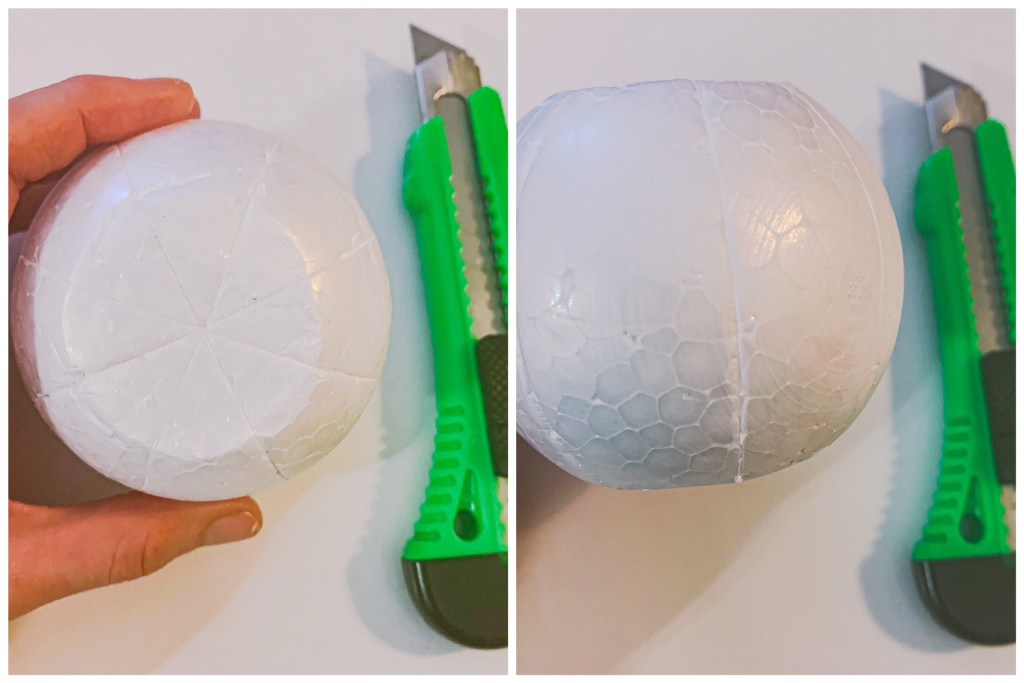
Using a box cutter or a serrated knife, cut lines into the pumpkin going all the way around as shown in the photo. These lines do not have to be very deep. For 3″ or 4″ pumpkins, I think 4 total lines around the whole pumpkin work best (so cutting so it looks like there are 8 slices).
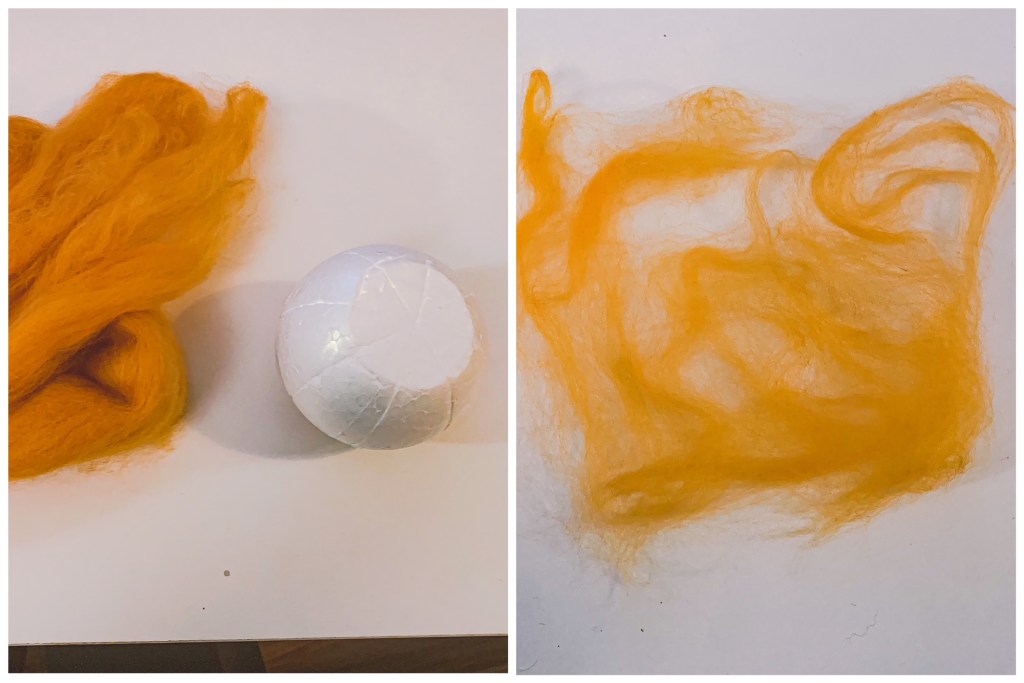
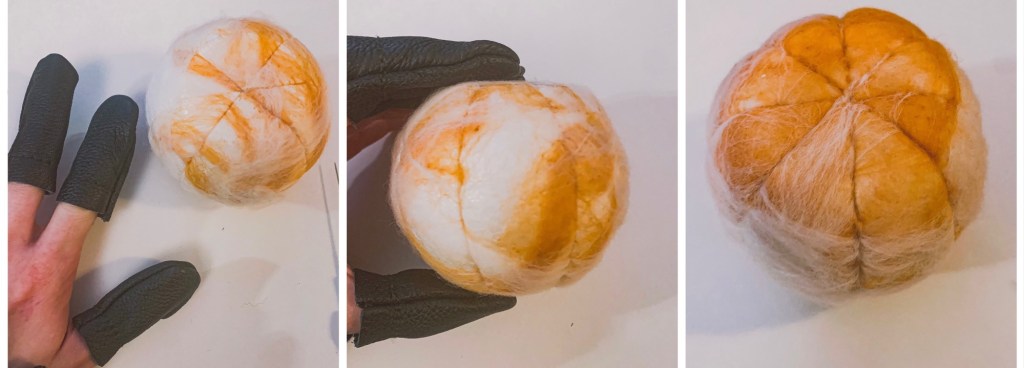
Grab the wool roving that you want to use as your base color. tear off a piece that can wrap around the whole foam pumpkin center.
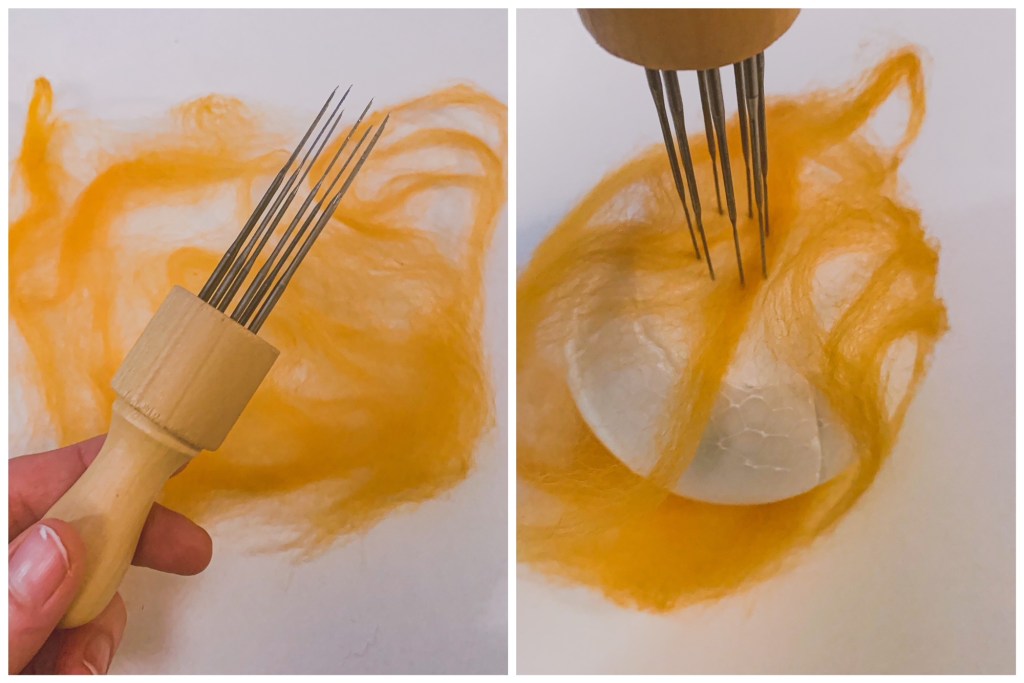
Wrap the wool roving around your foam pumpkin form. Use the multi-needle felting tool to stab the wool roving into the foam. Stab all over, the way that felting works is that the barbed felting needles basically grab the wool and push it into the foam or into other wool so the fibers get intertwined.

Here are some close ups where you can see the marks from the needles. As you add more wool roving the marks will be far less noticeable.

I love using a second and even a third color to give it a little bit of a marbled look. Grab your second color and follow the same steps as above to wrap the pumpkin and stab the wool into place. You can also feel free to just use the same color as before if you prefer to make a monochromatic pumpkin.
After adding a second layer, feel your pumpkin to find the ridges you originally cut into the foam. Use your single needle felting tool to stab the wool into the ridges so they show on the outside of the wool. Do this all the way around the pumpkin in every ridge you created.
Oops, I finally remembered to put on my felting thimbles. I was reminded because I stabbed myself while I wasn’t wearing them. These barbed needles are no joke, I STRONGLY recommend using these thimbles to protect your fingers. Keep adding layers of wool until you completely cover the pumpkin and no longer see any Styrofoam. I think it is also easiest to keep stabbing the wool into the ridges as you go as well, so you don’t lose them as you add more layers.
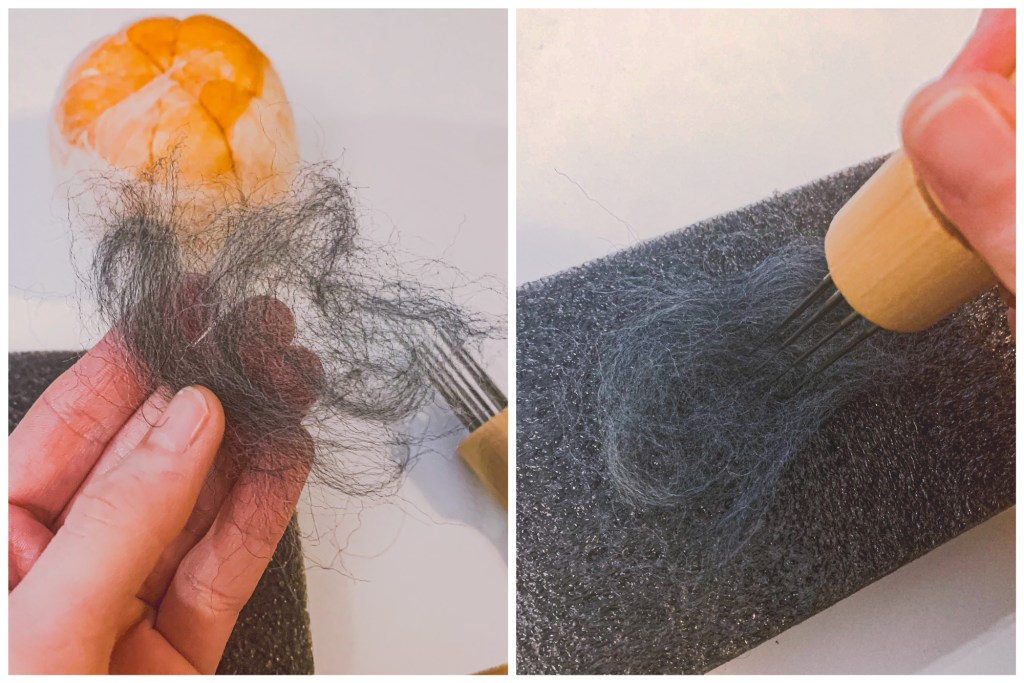
For the stem, grab a small bunch of wool in a color of your choice ( I used a dark charcoal gray because I love how it looks against the rusty orange color). Lay the small piece of wool on the foam pad and stab it flat using either the multi needle or single needle felting tools.
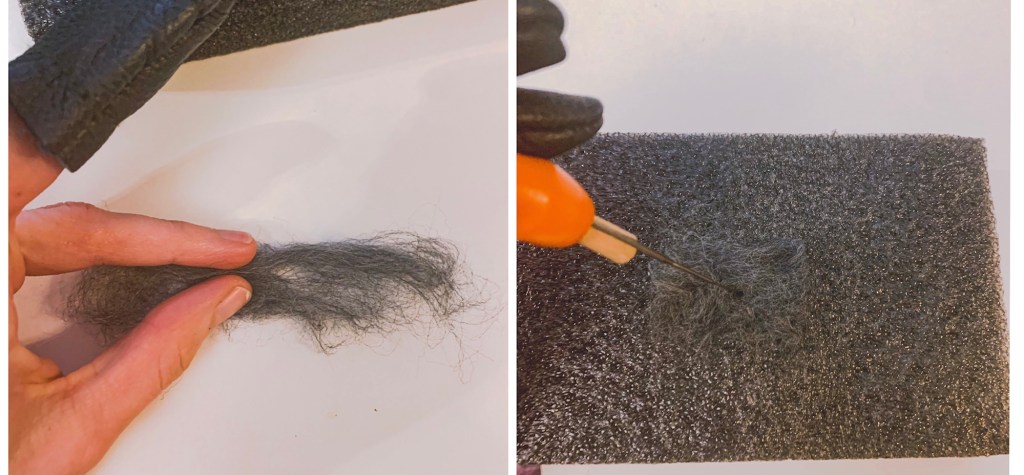
Peel the wool off the foam pad and fold it over lengthwise (hot dog fold, for those who remember the lessons of kindergarten) so it is almost in a long rectangular shape. Put it on the felt pad and stab so it keeps the shape. Then fold the wool over width-wise (hamburger fold) and again place on the felt pad to stab into shape.
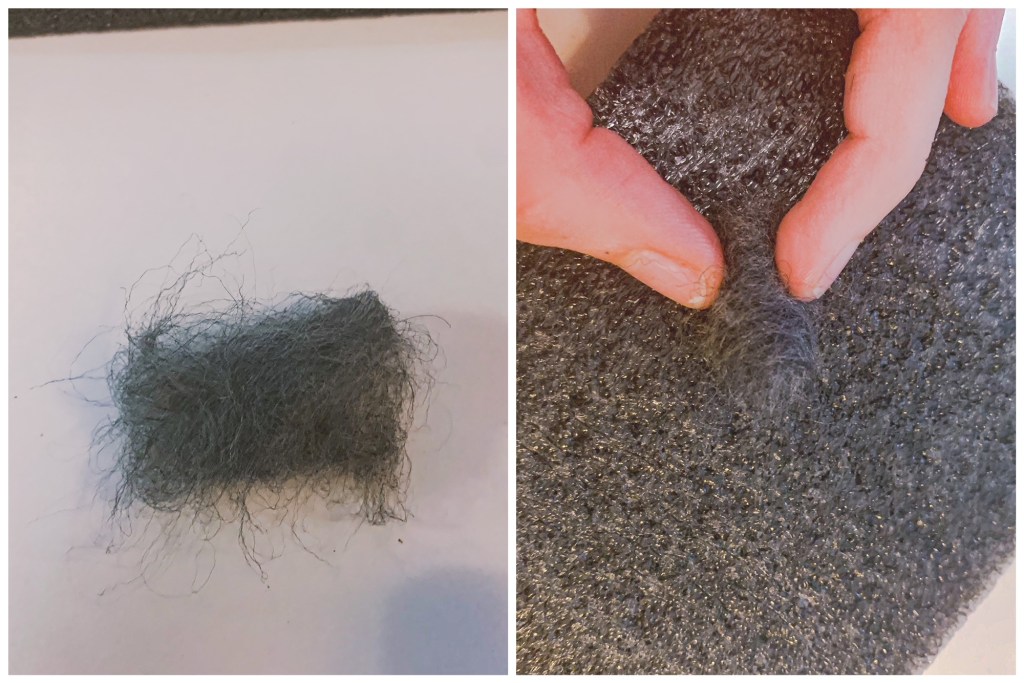
Above you can see the rectangle shape created. Place this on your foam pad again and roll it up. Use your single needle felting tool to stab the roll in place so it is shaped like a small cylinder.
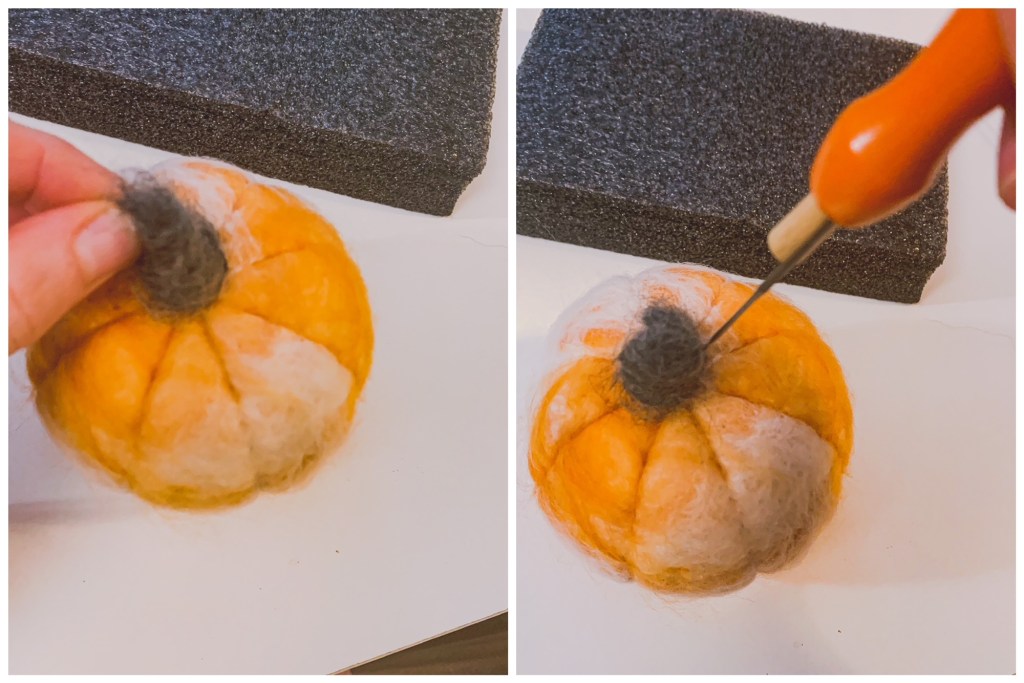
Finally, place the small cylinder shaped wool onto the top of the pumpkin. Use your single needle felting tool to poke the stem into the rest of the pumpkin and to shape it a bit more cleanly by poking the stem wool into itself.

Here is the finished product! This is such a simple and adorable craft and by DIYing you can make a bunch for the price of one or two at a store. These are great for gifts, to decorate your table for thanksgiving, or just to use as home decor during fall. You could even make mini ones into a garland!

How beautiful! I love these pumpkins and your first blog post.
Thanks for your inspiration and I can’t wait for more blog posts.
Congratulations on your blog! 🎉🙌🏻
LikeLike