

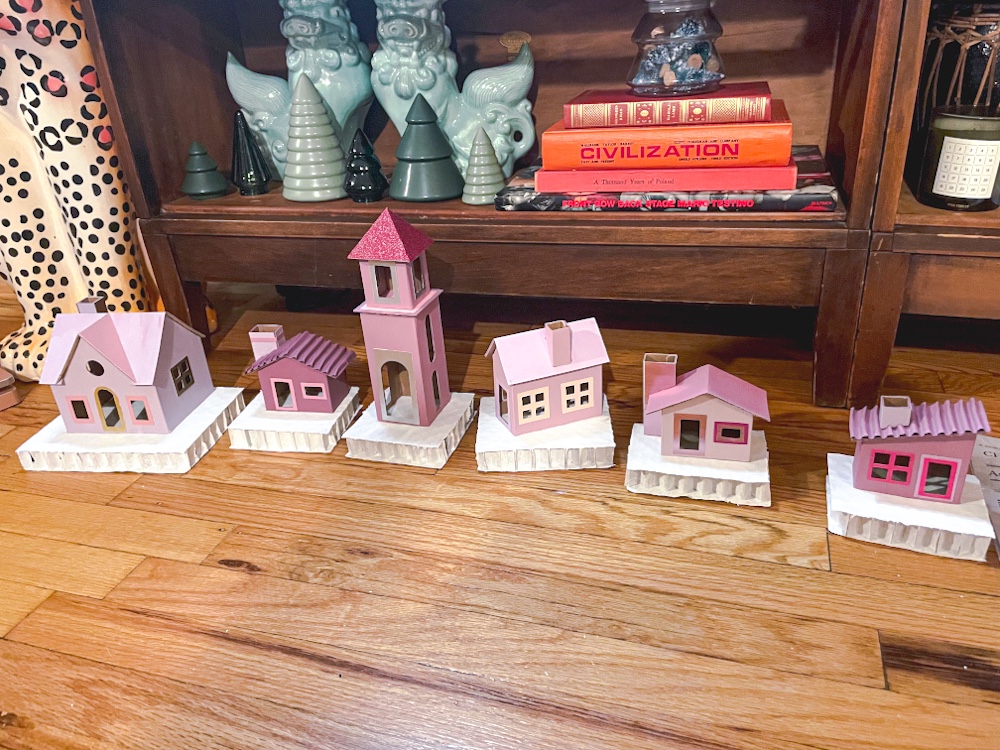
Happy holidays! I wanted to share a fun holiday/Christmas DIY – miniature cardboard putz houses, similar to the vintage ones that sell upwards of $30 each online!


How cute are these!! See intructions on how to create your own below!

Materials you will need:
- Cardboard house cut outs: The houses I used came precut from Etsy. However, there are plenty of awesome printable house patterns out there to save money and make your own house cut-outs from cardboard sheets or reused cardboard shipping boxes. Here is a website with a few different styles. And here is a blog with retro mid century styles if that’s what you’re looking for! You can find tons more searching google or Pinterest.
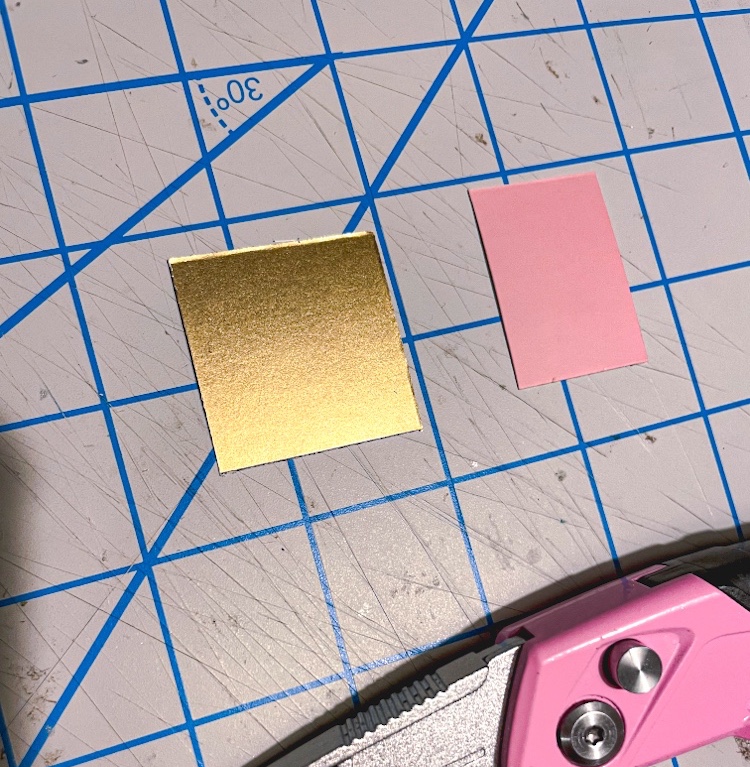
- Scrapbook paper or cardstock paper: I love mixing in metallics and glitter paper with matte shades. Paper with different textures are great to add in.
- Glue: I used clear precision gorilla glue (be careful not to accidentally glue your fingers to the paper while creating these as pulling your fingers off would rip the paper and you really dont want to get gorilla glue on your hand anyway, I promise). A hot glue gun would also work and some may find it easier to use!
- Paint: Mixing in a few different shades or coordinating colors is fun to create a colorful, yet cohesive village. Any acrylic craft paint will work.
- Glitter Paint/Mod Podge: Make sure it is a type of paint that dries clear so it just adds a layer of sparkles. The hologram or irridescent sparkles work best to look like snow.
- Retractable Knife (Exacto Knife may work): I find a retractable knife easiest because I like how it fits in my hand and it can cut through thick cardboard, but an exacto knife will work as long as you aren’t cutting through super thick cardboard!
- Ruler: Metal works the best to use with knife blades.
- Pencil
- Corrugated Fiberboard for the house bases (you can also use a different form of sturdy, thick cardboard or layer multiple pieces): I used extra thick corrugated fiberboard from packaging I had saved from something I ordered in the mail (gotta love sustainability!!).
- Flexible Corrugated Cardboard (optional): Also used from leftover packaging, but you can also purchase.
- Mini Bottle Brush Trees: I chose a bundle that contained pink, natural, and metallic gold and silver to go with my color scheme.
- Faux Snow: I used loose faux snow powder as well as faux snow cover/blanket that came in a sheet. You can choose to use only one if you prefer! You don’t need much of either for this project.
- Beads, Glitter, Sequins, Rhinestones, etc. (optional)
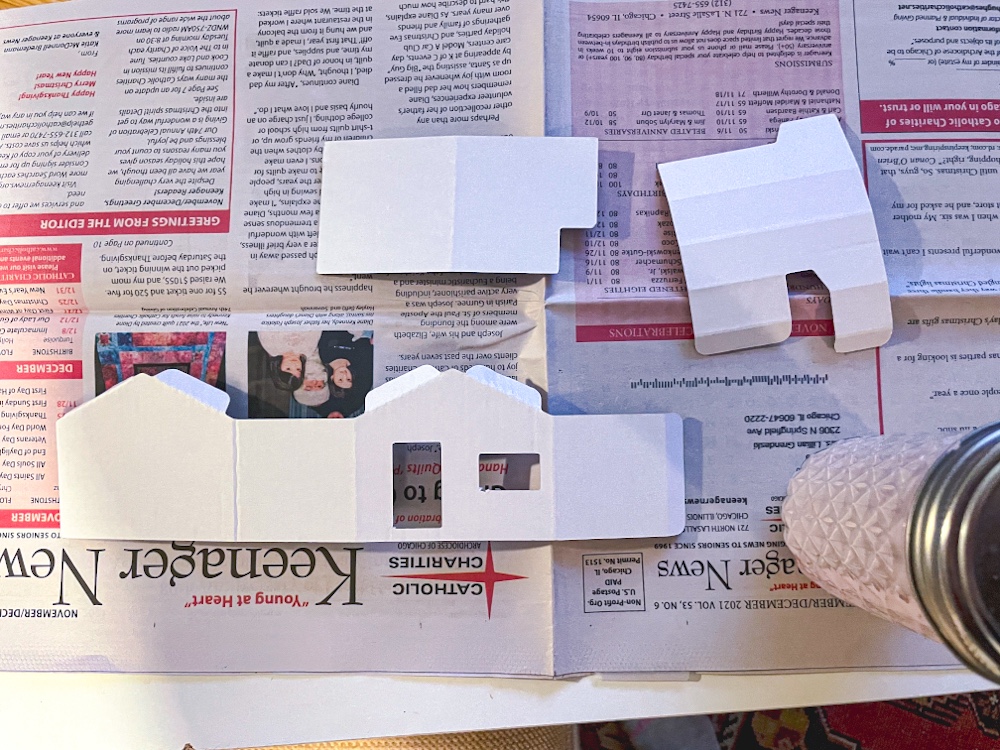

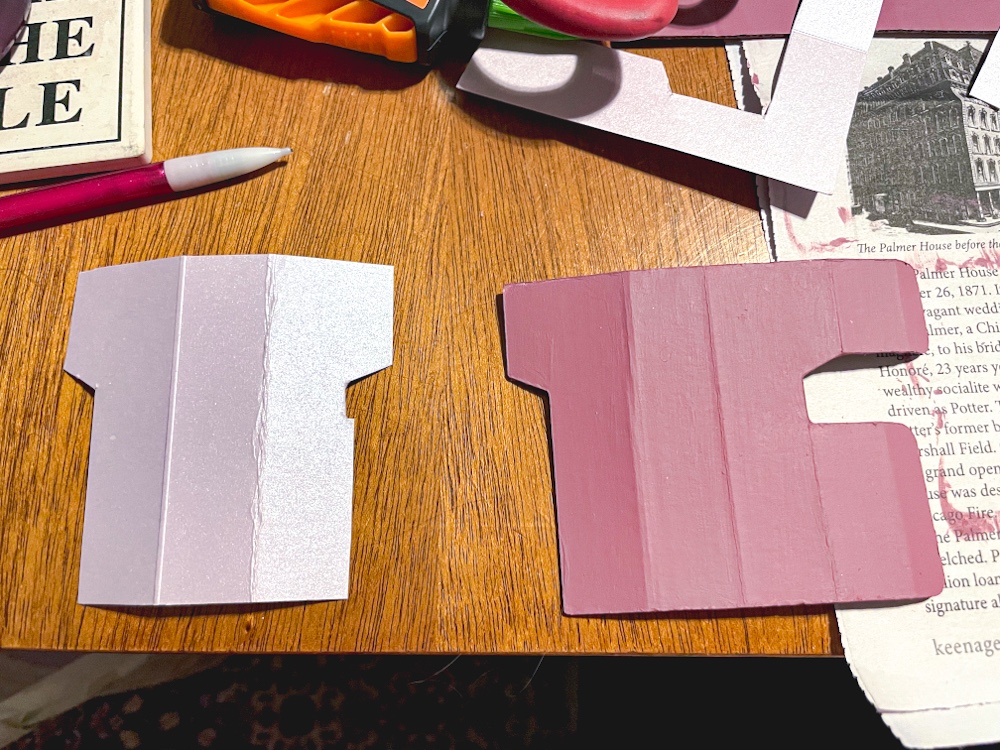
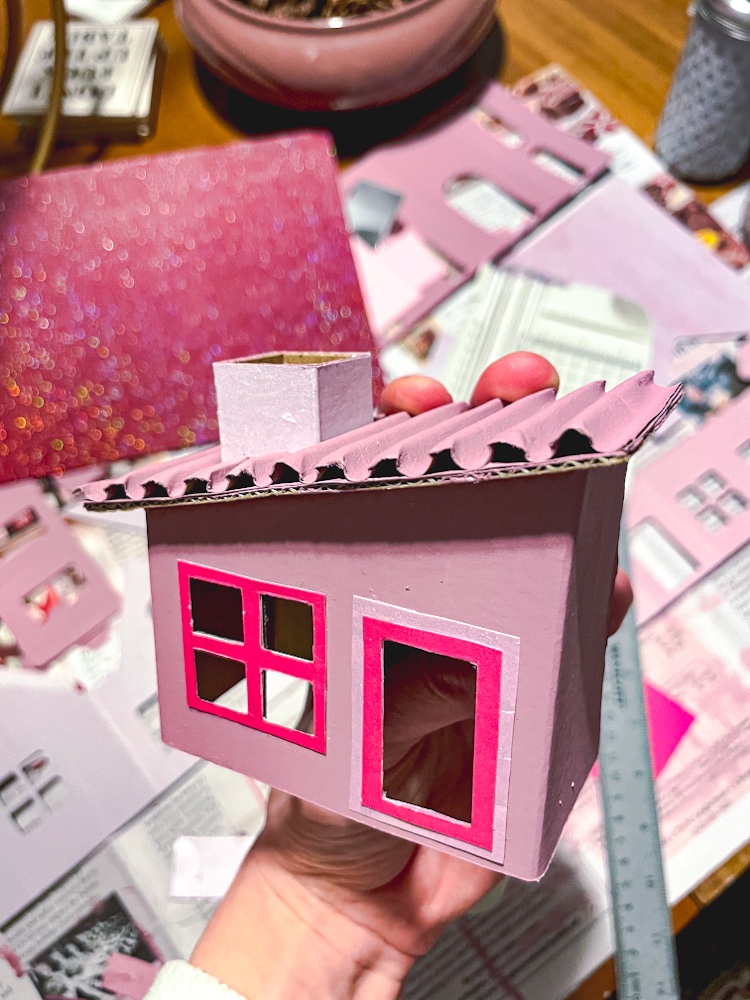
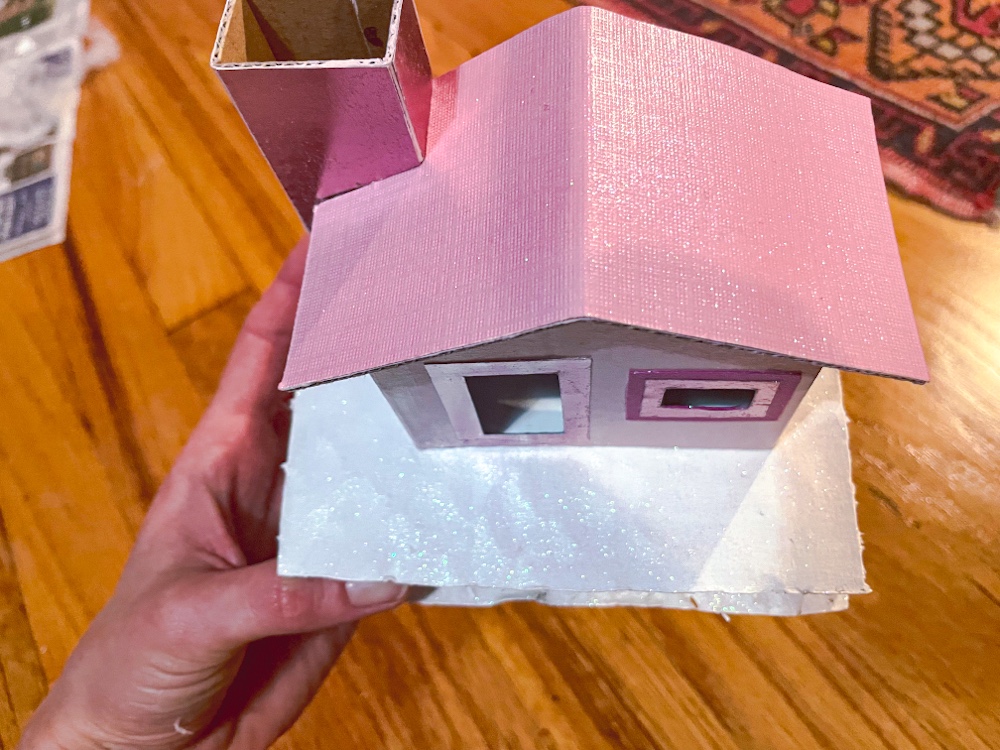
Paint your cardboard house cut outs in whatever colors you wish – I chose pink of course! For each house I painted all the pieces the same color, but feel free to mix it up. I used different shades of the same color to have a cohensive look since I planned to display the houses all together, but again, the colors are up to you.
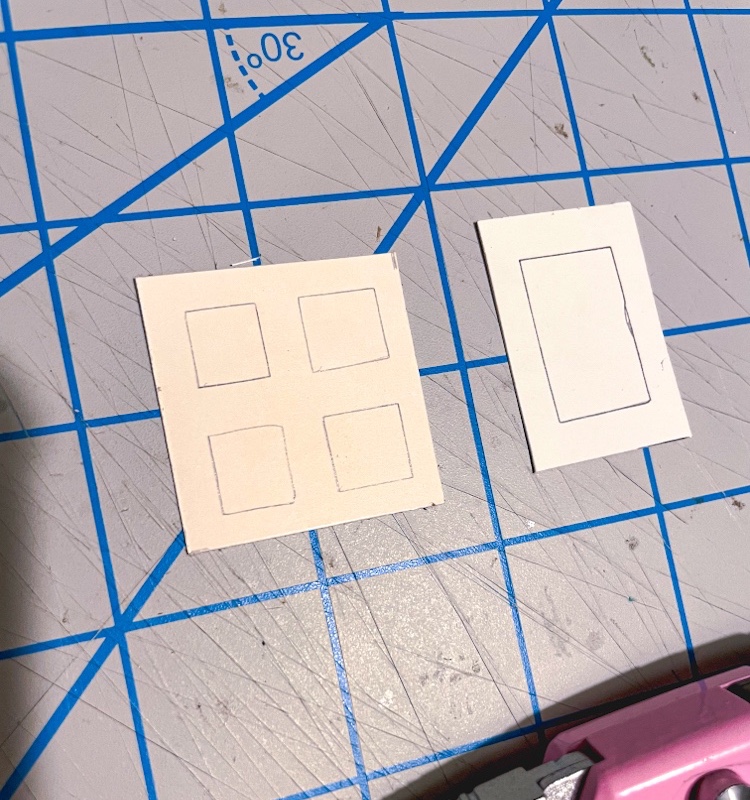
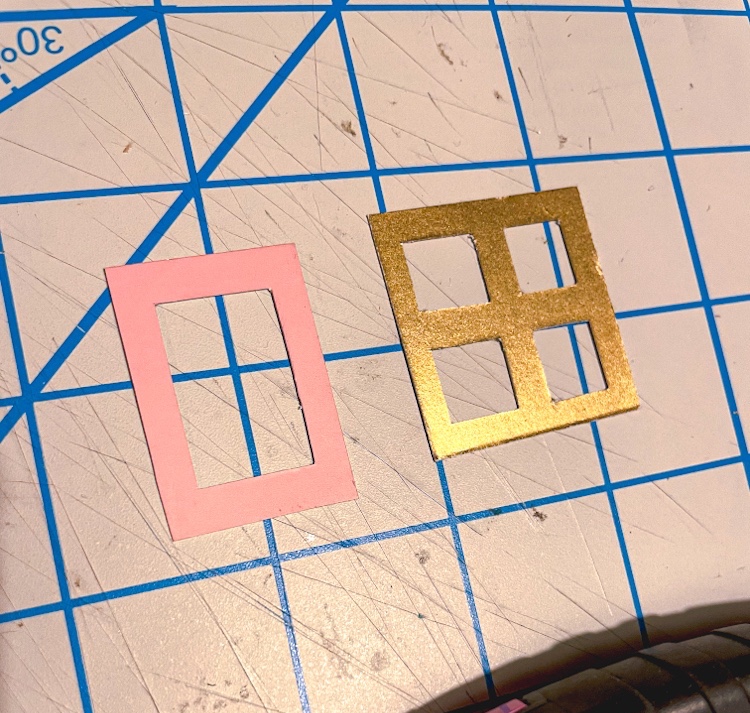
Use a pencil and ruler to cut out shapes to frame windows and doorways on your house out of paper. Then use the ruler and pencil to draw out the inner cut outs. When cutting use the ruler as a guide and go slowly – you don’t have to press down super hard with the knife, instead go over each line gently a few times to make the cut.
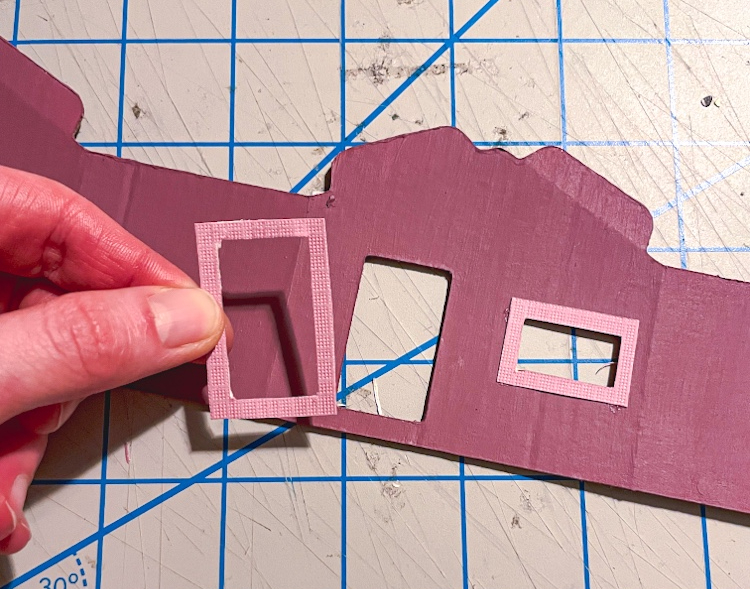

Glue the window and door frames to the house before assembling. You can also add paper to walls, chimneys, or the roof – just trace out the shape using the cardboard house piece as a guide. You may also use corrugated cardboard on roofs to make texture that looks like shingles.

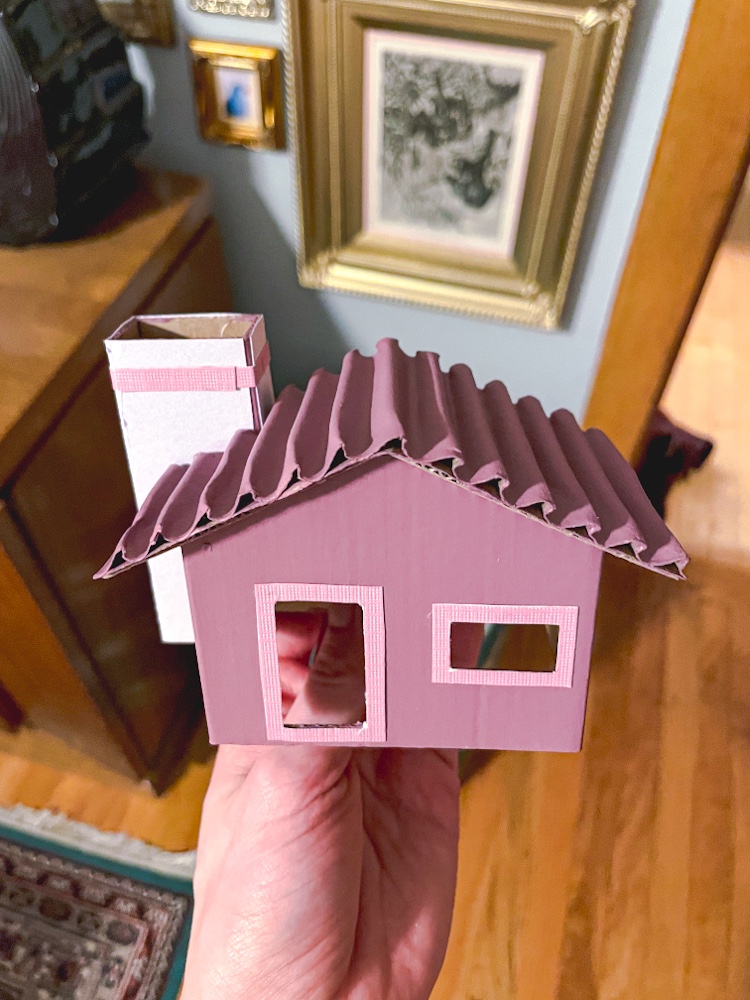

Once you have finished painting and adding paper to decorate you can assemble your house using glue.
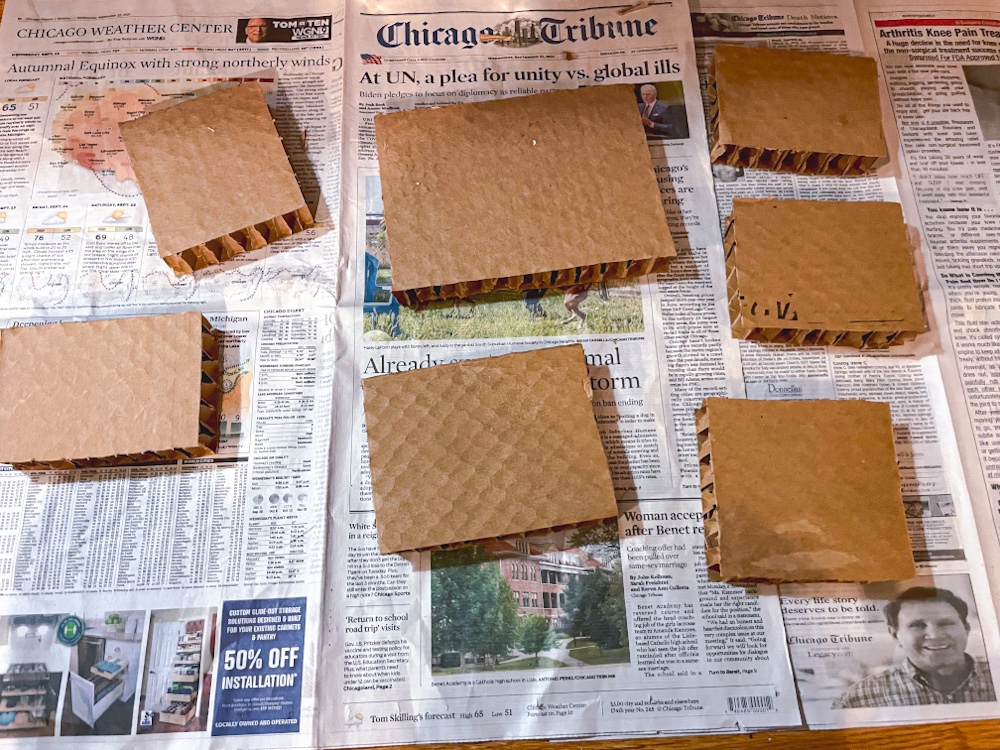
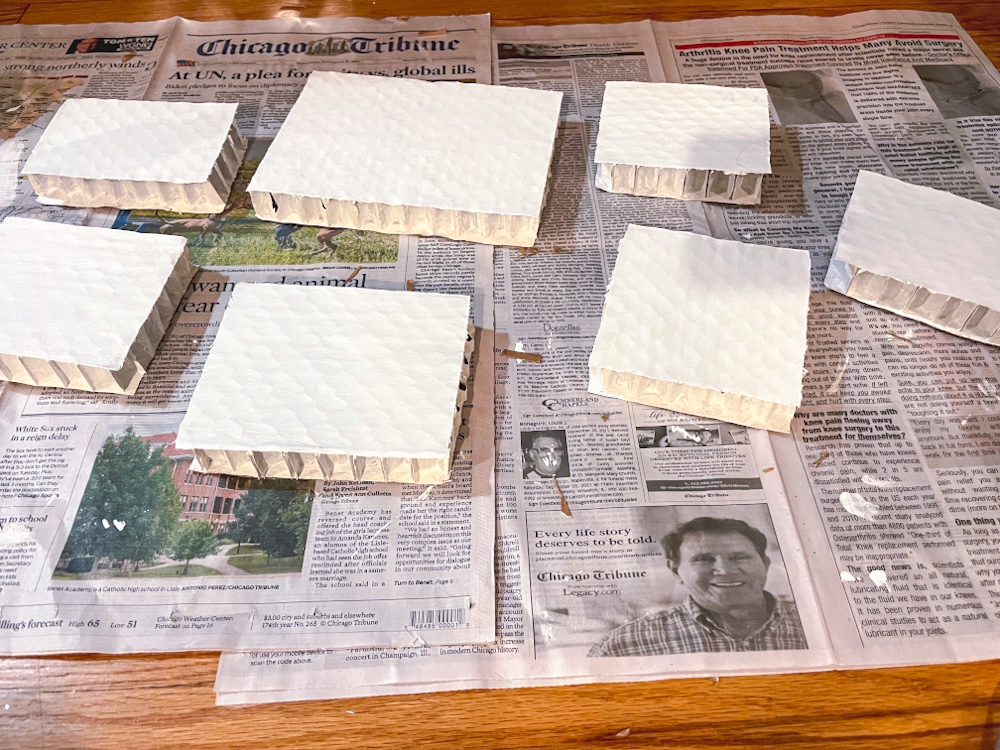
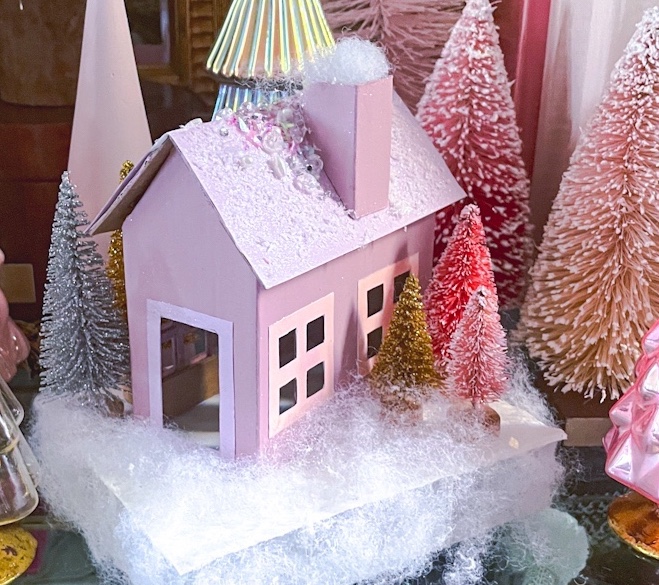
I used corrugated fiberboard to make the bases of my houses, but any thick cardboard should do. I cut the pieces so they would be a good size/shape depending on size/shape of each house as some are bigger than others. I then painted the bases white to look like snow.
Glue each house to the base. Then using glitter paint or glitter mod podge, paint a layer or two over the whole house and the base to give it a snowy sparkle.

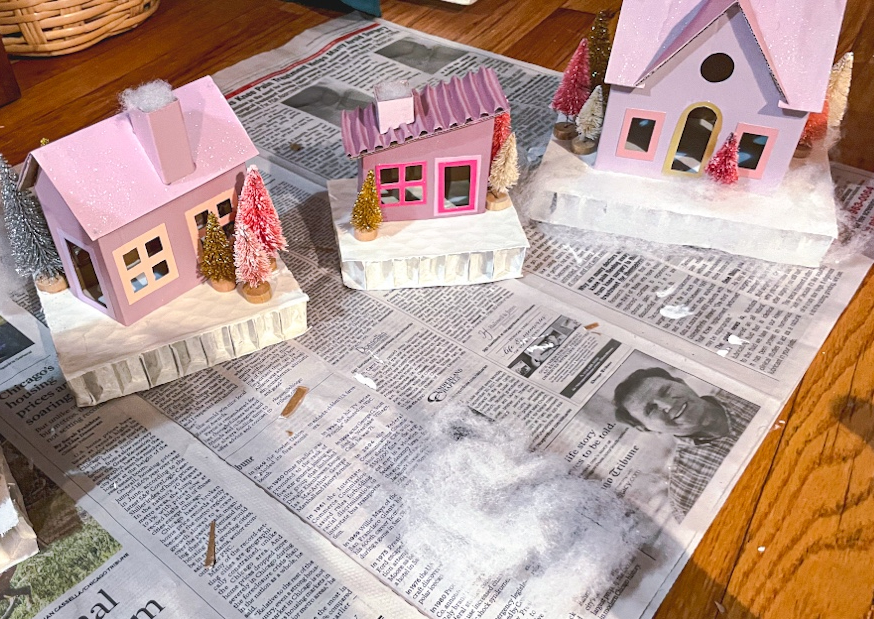
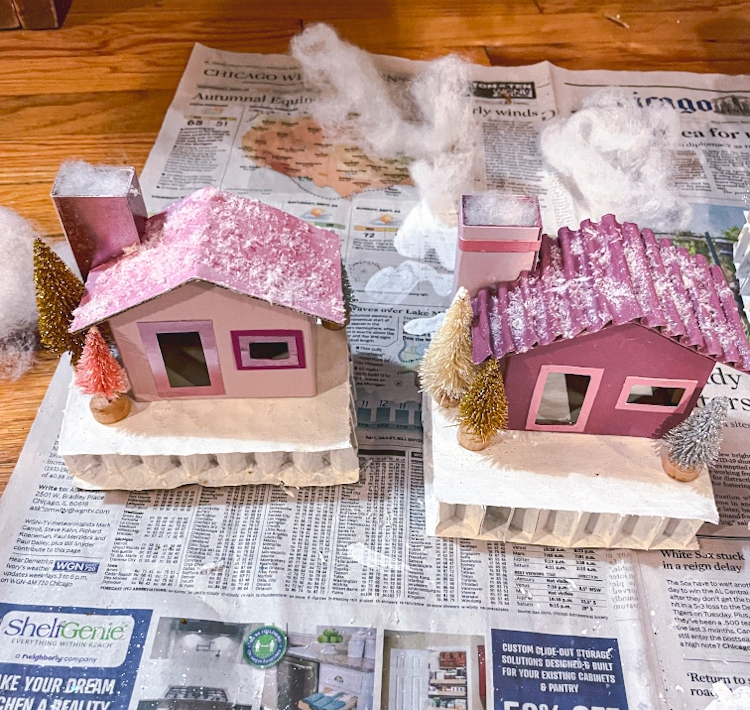
Glue mini bottle brush trees to the base of each house in a formation you like. I think it looks great to mix different sizes and colors on each house. I then added more glitter paint to each roof and sprinkled loose faux snow pieces on the top, which will stick to the glitter paint. I also added some small pieces of fuzzy snow cover/blanket in the chimneys to look like there is smoke coming out of them.

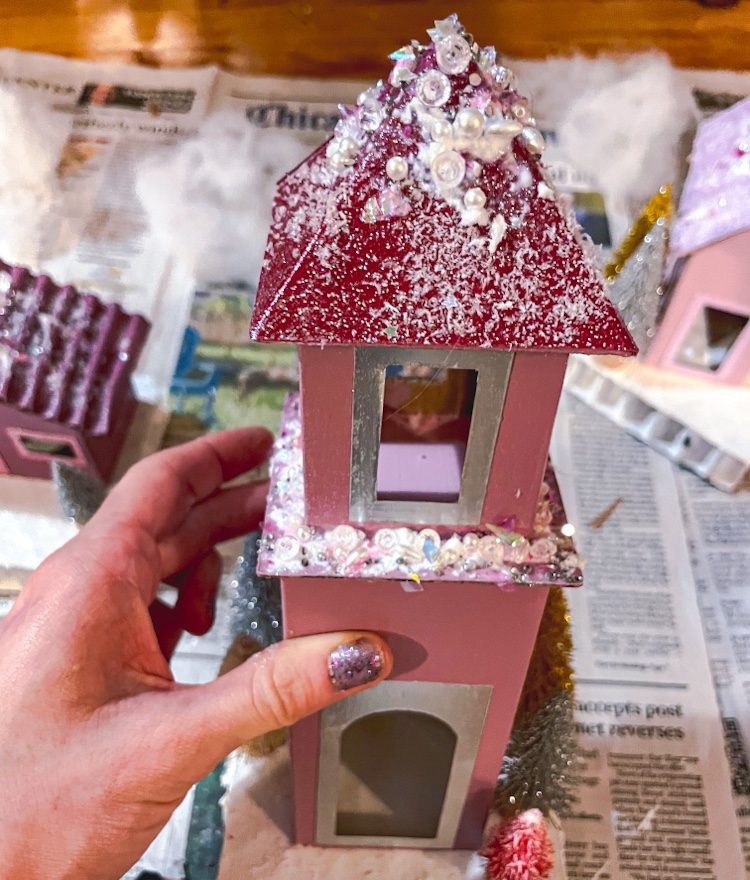
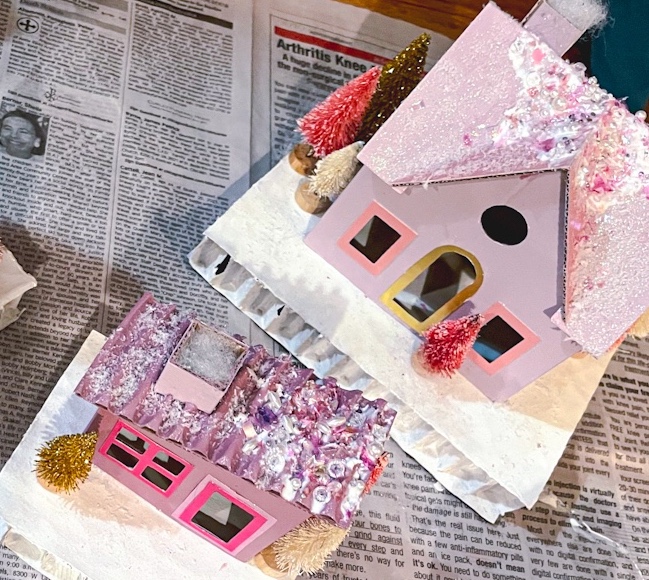
For some extra pizzazz and glamour you can sprinkle beads, glitter, sequins, and other embellishments on the top of the roof over the snow. In order to get heavier items to stick, I poured glitter paint onto the roof directly from the bottle and spread it on the top just slightly with a paint brush, keeping the coverage thick before sprinkling the embellishment items on top.

Finally, I wrapped some faux snow cover on the bottom and used a very small amount of glue to secure in a few spots on the base.

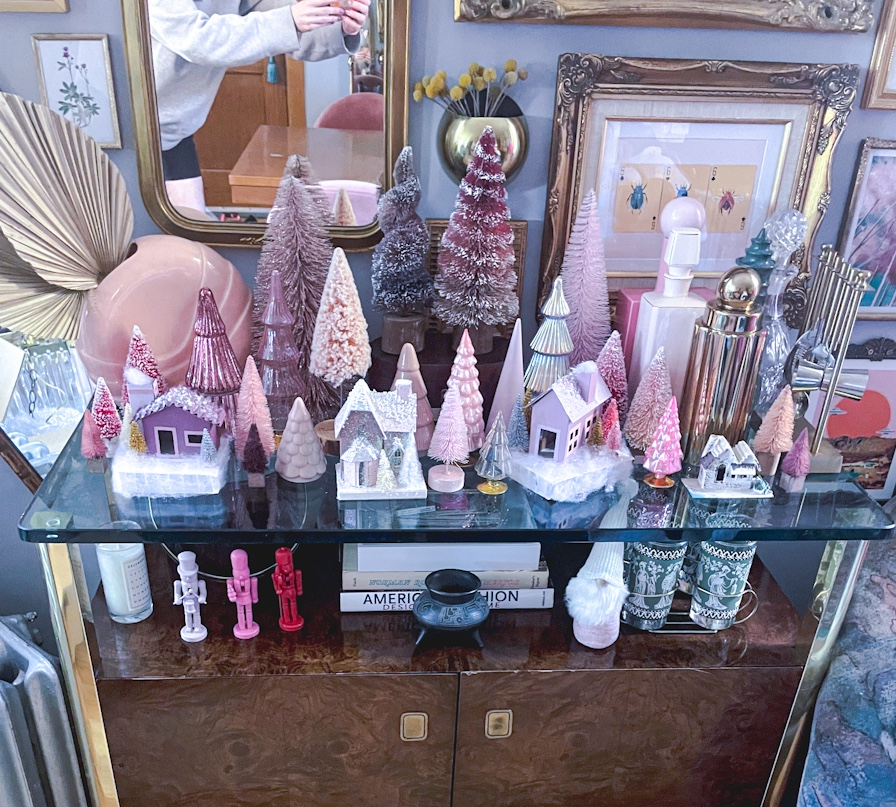
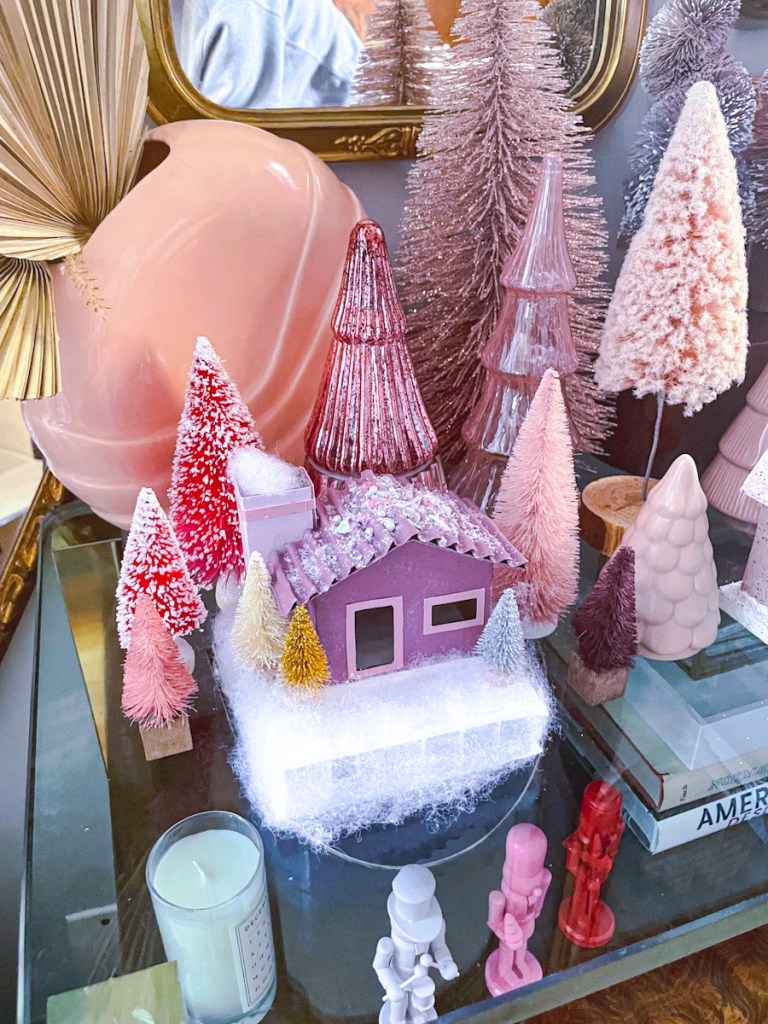
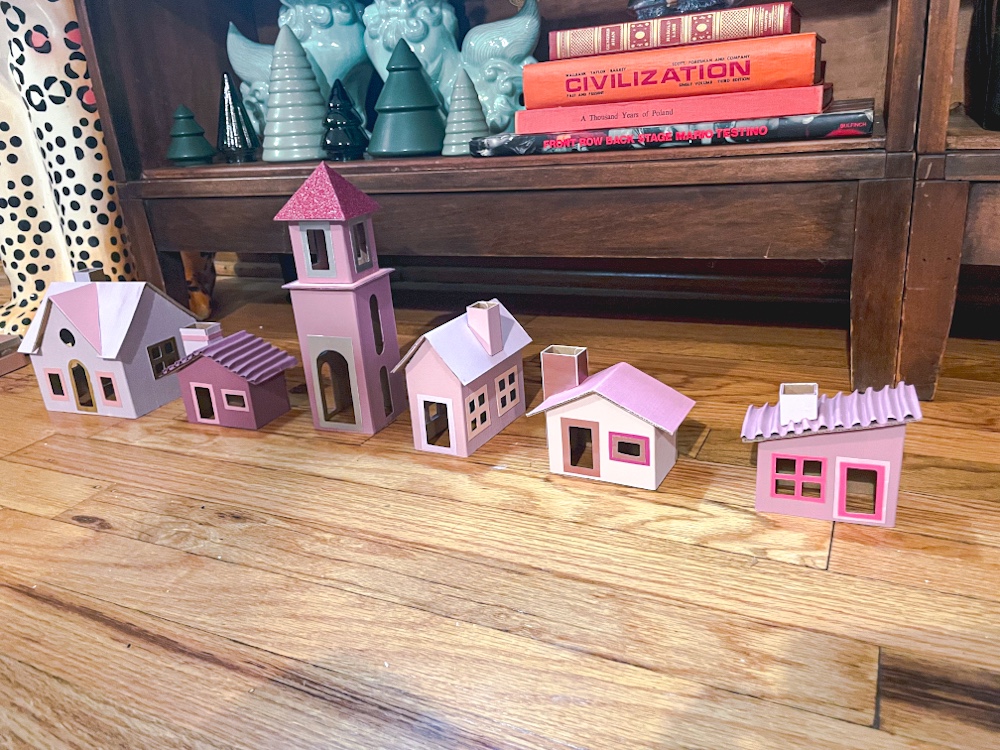
The houses are now complete! I paired with some putz style houses I already had, as well as large bottle brush, glass, and ceramic trees all in various shades of pink to create a holiday village that shines. As always, please share photos of your creations if you decide to make your own!
